Wednesday, May 29, 2013

beginning of yard sale season

I'm a total yard sale rubbernecker. Every time I pass one I end up slowing down to half speed and willing my brain to take in every item in the second and a half it takes me to drive by. Then I have just one more second to decide whether or not to pull over.

Well, last Friday, I finally pulled the trigger, and it totally payed off. Look what I scored for two bucks!


This baby has tons of potential. I might make some shelves like this:


Or use it to display blankets and fabric, either standing open or leaning against a wall like these:

via Pinterest, source unknown

via Pinterest, source unknown

Though, when I took it outside to take pictures 
I realized it might look cute on the front porch with plants on it, like this:

via Lovintage Finds on Etsy

Hey, as long as I'm having as much fun as this lady, I'm set. ; )


Tuesday, May 28, 2013

baking for non-bakers

I finally got out Zach's grandparents' old breadmaker this weekend. We've had it for a few years, but for some reason I kept putting off learning how to use it. I thought it would be super complicated. There were different flours involved and yeast. Yeast is scary. Plus I'm just not a baker; I don't find it the least bit fun. You end up with a sink and a half full of dishes and a finished product that may or may not work. So the breadmaker sat in the cupboard for two years.

Well, now I'm kicking myself, cause it. is. awesome. I ended up making three loaves in four days! That's a lot of bread for two adults and baby.


My first attempt was this whole wheat loaf. It was so easy! You just measure everything out in the pan and turn it on. All you have to clean are a couple of measuring cups and spoons. There's no kneading involved, no yeast starters, no setting timers for dough to rise. That's my kind of baking!


I had the bug and wanted to make more, but I didn't want to make another sandwich bread (we were already having a piece of that wheat with every meal and in between!). I had everything for the chocolate chip banana recipe from the booklet, and I am so glad we did. Between us and a few friends we scarfed this within 24 hours.


Then since Zach had to sleep all day Memorial Day, I got bored and made a loaf of Classic White. This one required a teensy bit more work since you had to start with warmed milk, but, again, so worth it.

Soon, I might get crazy and start playing with the timer feature. Can you imagine waking up to warm, fresh bread? I'm pretty sure that's the height of decadence.


Friday, May 24, 2013

one hour "one"sie

Jaina's birthday plans are coming along, and I've finished nearly all of the decorations. Her outfit is gonna be super cute and totally on-theme, but I needed a special birthday onesie for her.

I've determined that Target has no birthday onesies. I searched "birthday", "first", even "one" (of course filtering down to baby clothes each time), and came up with nothing. I even scrolled through every onesie and every baby shirt and found nothing. (Well, there was one that said "I Party Naked", but I didn't think that was appropriate).

Kohls had two shirts, and they were cute enough. But shirts just don't work well when you're a crawler. They ride up, and I wasn't gonna have her wear a onesie underneath for an outdoor party in June. Still looking for that one-year-onesie.

Walmart didn't have any; not online anyway. I saw one in the store, but it was ugly. So were Amazon's.

So, if you can't find what you're looking for, obviously you need to make it. And let's not kid ourselves, obviously I was gonna make it the whole time. ; )

It was extremely easy, and I finished it all during an episode of Grey's Anatomy. (Anyone else measure their projects in TV shows? As in, "It took me about three Downton Abbey's." No one?)

If you wanna make a birthday onesie for your little one, here's how you do it. This method also works great for those cute brown football onesies with the felt "stitches". 

So here's what you'll need:

- One plain onesie - NOT a Onesie brand undershirt. They're too thin. Hobby Lobby has great t-shirt weight onesies in a rainbow of colors. (And you know to never walk in there without your 40% off coupon, right?)
- Fusible web interfacing (I used Pellon Wonder Under)
- Felt square (Any craft store should sell them for around a quarter)
- Matching thread
- Needle
- Scissors
- Printer paper
- Iron
- Clean cloth

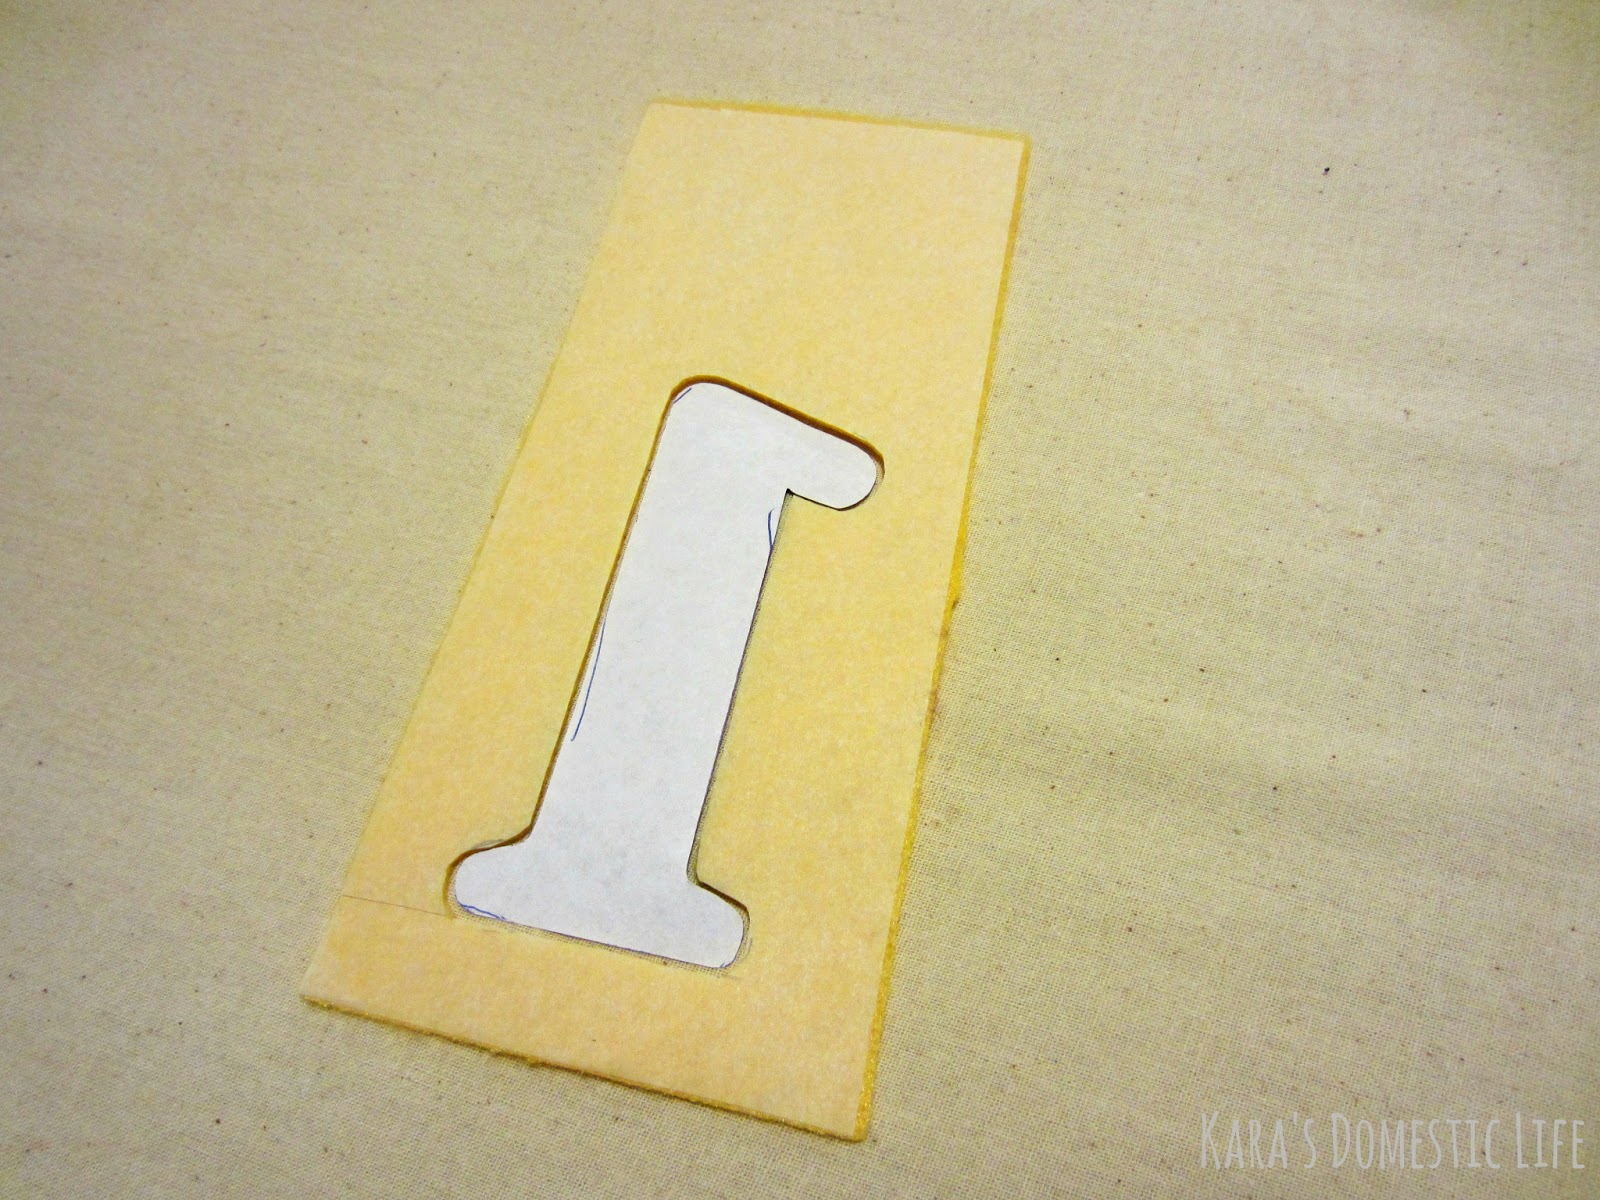
This project actually begins at the computer. Open up Word, and start looking through your fonts for cute "1"s. Try them in bold, even in italics if that's the look you're after. I knew I wanted a 1 with a serif (that's the bar on the bottom), so I had it narrowed down to just a few. Blow them up huge, print them out, and pick your favorite.

This 1's name was AR JULIAN, and it's in bold

Next, cut a piece of interfacing not much bigger than your 1 will be, and lay the rough side against your felt. Follow the directions that should come with your fusible web interfacing for adhering it with an iron.


After that, you'll need to cut out both the section of felt that now has interfacing attached and your number 1. Lay your 1 BACKWARDS on the interfacing and trace around it. The interfacing still has a paper backing, so it should be easy to write on with just a pencil.


Lay your onesie on the ironing board and flatten it out. Now peel the paper backing off of your cut-out and carefully position it on the onesie. Don't make it too low, babies have high waists. Again, follow your directions for ironing on the interfacing. Mine said to lay a clean, damp cloth over the cut out shape and press the iron down for 12 seconds, then take the cloth away and iron some more. Now, mine didn't completely hold to the edges, but I didn't spend a lot of time with it since I knew I'd be stitching all the way around.


Thread your needle and whip stitch or blanket stitch (if you're fancy) all the way around the number 1.


I realize this step might stretch the "one hour onesie" into an "all evening onesie" if you're not used to sewing, but don't be afraid of it. Remember, it's just an outfit for one day. It doesn't have to be perfect.


Not bad for about $3.25 worth of supplies. Plus, it matches the rest of her outfit (costume) perfectly. Can't wait to show you her whole getup in just three weeks! Here's a sneak preview.


Of course, she decided photo shoots are lame. She'd rather play with the camera,


and the sound machine,


 and the laundry,


and this book.


We've been taking a lot more video than stills lately. A picture just can't quite capture the busy-ness of an almost one year old. Almost one! Wow, can't believe it.


Tuesday, May 21, 2013

gatsby girls

Well, if it's quiet on the blog front, it's a good bet that it is busy-busy on the actual doing-of-projects front. Now if only I could slow down long enough to take pictures of everything I'm working on.

Meanwhile, my sisters (minus one who's waaaay far away in sunny Pasadena) came over to watch The Great Gatsby with me. I decided we should dress up, and we had some fun with it.


It's hard to express how awful we look in these pictures. We really looked much cooler in real life. I did up Faith's hair in a fabulous head scarf which turned out to be the perfect choice as every other girl wore one in the movie. And my hair was twisted back into a low, wide bun - sort of like this - with a cool black and jeweled headband. Plus, I had the perfect shoes. Again, horrible angle in our photo. We really just need to invest in a full time fashion photographer to follow us around and capture the genius in each outfit the way no husband can (love you, sweetie).
These are no longer available, but they're Jellypop, and I got them from good old DSW. Mine have a gray stripe and black grossgrain ribbons. Don't they kind of look like tap shoes?

Speaking of tap, the music from the movie might have been my favorite part (okay, second favorite. hello, the clothes?), and my feet were tapping all over during this little number.


Thanks, sissies for making it a fun day!

Thursday, May 16, 2013

tshirt necklaces

Here are some pretties I've been making lately!


They're made out of up-cycled t-shirts, and I'm selling them for $8.00. 


When I started this post I had a whole rainbow of them, but they all sold!


Here's one in action. I usually wear mine doubled over.


You can also wear them long, knotted, or with a funky brooch around one side. I'll be making another batch soon. Leave a comment if you're interested, and I'll hook you up!


Saturday, May 11, 2013

you make me feel like a natural woman

Spending the afternoon with some lovely ladies today.

My grandma and my mom


My mom and me


 Me and my baby girl

So glad we live close by to these amazing woman. We're all oldest daughters, and, man, can we get stuff done. Just wait till Jaina's old enough to really join the gang. We're gonna be a force to be reckoned with!


I love you, Jaina Carol, and I'm so happy to be your Mama. You're pretty cool. 


Wednesday, May 1, 2013

ribbon bunting sneak peek

Here's another little peek at Jaina's birthday preparations. It's still over a month away, but I've been having fun doing the handmade projects for it over the past few weeks. Hopefully that'll keep me sane once the time comes.


Ribbon buntings are totally trending right now. I realize it doesn't look like much against the wall, there, but it's actually over ten feet long at this point.


I've had my vintage ric-rac,


and yarn,

 and ribbon all cut and laid out.

 I'm curious, do any other crafters end up using their ironing boards as desks?
I find it keeps the little one out of everything. That is until she's strong enough to knock
over the board. (Don't worry, I don't leave the actual iron, or scissors, on it during the day.)


 As always, I took the strategically-planned-to-look-as-random-as-possible-approach. ; )


It's been a fun project these past few nights. And the best part: all of the supplies were things I already had around the house. Free party decor, yay!


Ribbon bunting like this is a great way to use up all of the half-spools of ribbon and teeny balls of yarn that just won't be that useful otherwise. I have plenty of it left, so I hope to make a lot more of these.We're gonna make that park pavilion look tassel-tastic!

P.S. For those of you who've followed KDL for a while, you might remember a post I did last December with a lot of these colors and textures. BIG clue to Jaina's party theme. ; ) No link help. See if you can find it!